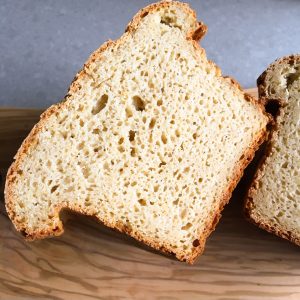
One of the first successful gluten free breads I made was from The How Can It Be Gluten Free Cookbook by America’s Test Kitchen. The photo on the left is from the first time I made this bread, where I diligently followed the instructions in cookbook – which has you wrap a foil collar around a regular 8 1/2 x 4 1/2-inch loaf pan, and I wasn’t thrilled with the results visually.
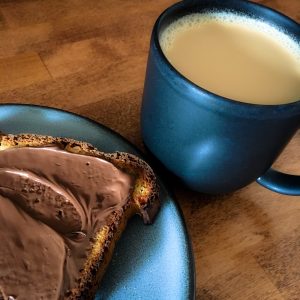
The bread tasted delicious, especially with some Nutella and a cup of coffee, but I wanted something that looked more like a sandwich loaf.
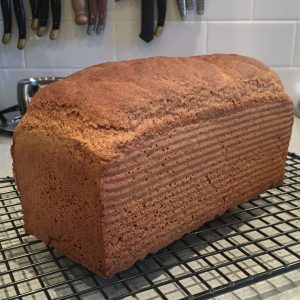
After a few other baking experiments, I thought that the high sides of a pullman loaf pan would be a lot easier way to give this gluten free bread recipe support without a foil collar. Believe it or not, the loaf on the right is the very same recipe – just baked in a different loaf pan! In my short time as a dedicated gluten free baker, I’ve learned the amazing difference that the right equipment makes when baking gluten free bread. My love for the pullman loaf pan in gluten free baking is unrivaled.

| Prep Time | 30 minutes |
| Cook Time | 90 minutes |
| Passive Time | 60 minutes |
| Servings |
loaf
|
- 2 cups warm water (110 degrees)
- 2 large eggs
- 2 Tablespoons unsalted butter melted and cooled
- 14 oz ATK Gluten-Free Flour Blend*
- 4 oz gluten-free oat flour
- 1 1/2 oz nonfat milk powder
- 3 Tablespoons powdered psyllium husk
- 2 Tablespoons sugar
- 2 1/4 teaspoons rapid rise yeast
- 2 teaspoons baking powder
- 1 1/2 teaspoons salt
- 24 oz white rice flour
- 7 1/2 oz brown rice flour
- 7 oz potato starch
- 3 oz tapioca starch
- 3 Tablespoons nonfat milk powder
Ingredients
*ATK Gluten-Free Flour Blend
|
|
- Whisk water, eggs, and melted butter together in bowl.
- Using stand mixer with paddle, mix flour blend, oat flour, milk powder, psyllium, sugar, yeast, baking powder, and salt together at low speed.
- Slowly add water mixture and let dough come together, about 1 minute, scraping down sides of bowl as needed.
- Increase speed to medium and beat until sticky and uniform, about 6 minutes. (This may seem strange, but it is very necessary. I set a timer to ensure I let the dough mix enough. The dough will look like cookie dough - but that is normal for this recipe.)
- Spray pullman loaf pan with vegetable oil spray.
- With a rubber spatula, scrape dough into prepared loaf pan and press gently into the corners with wet hands or spatula.
- Smooth top of dough and spray with water.
- Cover loosely with plastic wrap that has been sprayed with vegetable oil spray (just in case your bread rises and touched the plastic wrap - if it is sprayed with vegetable oil spray you will have an easier time pulling the plastic wrap off without damaging any structure.)
- Let rise for about 1 hour at room temp, until dough has risen about 50%. (If your kitchen is cold, you can put the plastic wrapped pan in your oven with the light on, in a toaster oven, or in the microwave, which will act like a dry proofing box.)
- Adjust oven rack to middle position and heat oven to 350 degrees.
- Remove plastic and spray loaf with water.
- Bake until top is golden, crust is firm, and loaf sounds hollow when tapped, about 1 1/2 hours, rotating pan halfway through baking. (If you notice that your bread still doesn't sound hollow after 1 1/2 hours, remove bread from pan, and bake in the oven on a sheet pan or directly on the rack for another 10 - 15 minutes, or until bread sounds hollow when tapped.)
- Transfer pan to wire rack and let bread cool for 10 minutes.
- Remove loaf from pan and let cool completely on a rack, about 2 hours. (It will be very tempting to cut into the bread when it is warm - but RESIST the temptation and DON'T DO IT! Gluten free bread really needs to be cool before cutting, because the final internal structure of the bread is also forming while it is cooling - and if you cut it while warm it will be gummy.)
- Once the bread is cooled, you can wrap it and store it at room temp for a few days. Alternatively, you can slice it, place in freezer bags, and freeze it for toasting.
Leave a Reply